Picky Kitchen Picky Kitchen

China Top 10 Gas Ovens How to Fix Uneven Temperatures?

Time:2026-09-26 Author:Sophia
0%

China’s top 10 gas ovens can look similar in a showroom, yet their heat patterns may differ at home. A cake browning darkly on one side, while the other stays pale, is a useful clue. So is a tray of unevenly roasted vegetables. These symptoms do not always mean the oven is faulty. Rack position, cookware, burner condition, and door seals can all affect results.

This guide explains how to fix an uneven temperature in a gas oven, beginning with simple checks and moving toward service needs. Use an oven thermometer to compare the set temperature with the actual reading. Test more than one rack position, and note where food browns fastest. Small details matter. A blocked burner port or a warped baking tray can change the result. If you smell gas or see an abnormal flame, stop using the appliance and contact a qualified technician.

For a verified expert quotation, insert a source-backed statement here: “[Verified quotation about diagnosing uneven oven temperatures].” — [Expert name], [relevant appliance-repair credential]. Without a reliable source, assigning a quotation to a named specialist would be misleading. The guide therefore focuses on practical checks, clear warning signs, and safe next steps. One limitation remains: oven designs vary, so the manufacturer’s manual should guide model-specific adjustments.
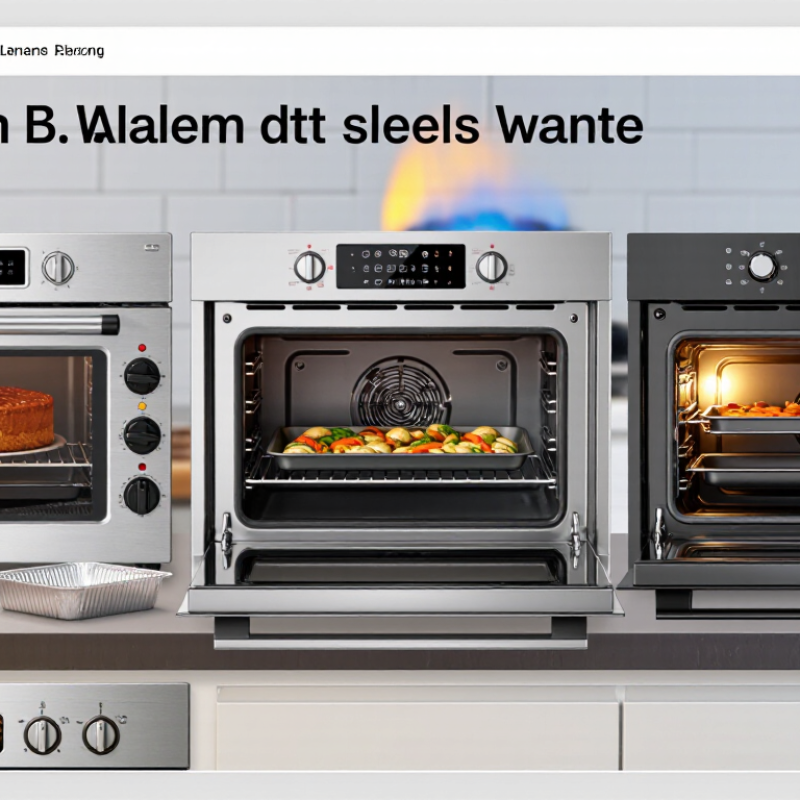
China Top 10 Gas Ovens How to Fix Uneven Temperatures?

Compare China’s Top 10 Gas Ovens by Burner Layout and GB 16410-2020

China Top 10 Gas Ovens: Compare Burner Layouts and GB 16410-2020

A useful comparison of ten gas ovens starts with burner layout, not price or appearance. Check whether the burner sits beneath the oven floor, along the rear wall, or in a design with added circulation. Its position, flame ports, heat shield, and rack spacing can affect how heat reaches food. A lower tray may brown faster than a pan on the middle rack. Small details matter.

GB 16410-2020 sets requirements for household gas cooking appliances, but compliance alone does not promise perfectly even baking. Check each model’s documentation for the applicable standard and conformity information. Then compare usable cavity size, stated burner arrangement, temperature controls, and any circulation features. A neat specification table can still hide uneven results. Real cooking tests matter.

Tips: Place an oven thermometer near the center and check it after preheating. Bake the same tray of biscuits on one rack, then note differences in browning. Rotate the tray only if the manual permits. The method is simple, not perfect; home thermometers and kitchens vary. Use these checks alongside product documentation, rather than treating them as formal certification.

Map Hot and Cold Zones with 3 Rack-Level Readings at 180°C

To compare China’s top 10 gas ovens, map heat at three rack levels rather than trusting one center reading. Place oven-safe probes at the front-center of the upper, middle, and lower racks. Set the oven to 180°C, allow it to preheat, then record readings every five minutes for 20 minutes. Keep the door closed; each opening can disturb the readings. Small differences matter. Repeat the test, because gas burners cycle and one run may mislead.

The U.S. Department of Energy’s cooking-products test procedure, 10 CFR Part 430, Appendix I1, uses controlled oven tests for energy measurement; it does not promise identical temperatures across racks. Treat your three readings as a practical comparison, not a certified laboratory result. For example, if the upper rack holds 190°C while the lower stays near 170°C, rotate trays or choose the rack that best suits the dish. Check probe accuracy too. A cheap thermometer can add its own error.

Tips: Use the same probes and positions for every oven. Note each reading beside a simple rack sketch. Avoid placing probes against metal walls. If results vary sharply between runs, check the test setup before blaming the appliance; I would not overinterpret a single uneven bake.

Check Gas Type and Pressure: China’s Common NG 2.0 kPa and LPG 2.8 kPa

Uneven oven heat can begin with a pressure mismatch, not a faulty thermostat. In China, common rated pressures are 2.0 kPa for natural gas and 2.8 kPa for LPG. GB 16410-2020, the national standard for domestic gas cooking appliances, provides the technical framework for matching appliances to gas types and operating conditions. Check the oven’s rating plate and installation paperwork before judging its flame. A small label matters.

A qualified technician can compare the supply pressure with the appliance specification using a manometer. Do not change a regulator setting by guesswork. If the pressure is too low, flames may look weak and heating can lag; if the fuel type or pressure is wrong, combustion may become unstable. Look for a steady blue flame, while remembering that flame appearance alone cannot confirm pressure. That part is easy to miss. Blocked burner ports, a dirty burner cap, or a damaged door seal can also create hot and cool zones. For a practical check, place an oven thermometer at the center and corners, then compare readings after the oven has fully preheated. If the readings differ sharply, record them and request a pressure and burner inspection. GB 16410-2020 is a useful reference, but the appliance rating plate should guide the actual service check.

Inspect Flame, Thermostat, and Door Seal Against the Oven’s Nameplate

Uneven baking often starts with a mismatch between the oven’s actual setup and its nameplate. With the oven cool, photograph the plate and note the model, fuel type, and rated gas input. Check these against the manual’s specifications; do not assume the plate lists a temperature or thermostat setting. If the appliance was converted to another gas type, a qualified technician should verify the conversion and supply conditions.

Next, place a separate oven thermometer on the center rack. After preheating, record its reading through several heating cycles, since burners naturally switch on and off. Look through the window: a persistently weak, yellow, or sooty flame needs professional attention. Never remove burner parts to adjust gas flow yourself. The National Fire Protection Association’s Home Cooking Fires report found cooking equipment involved in 49% of reported U.S. home fires from 2014 to 2018. Small checks matter.

Inspect the door seal for flattened sections, tears, or visible gaps. A paper strip that slips out easily at one spot can suggest poor contact, though this is only a rough check. Compare temperature readings and seal condition with the model-specific service guidance, not another oven’s settings. I have seen people blame the thermostat too early; the door, rack position, or a dirty sensor can also mislead. If temperatures remain far off, share the nameplate photo and readings with a qualified gas-appliance technician.

China Top 10 Gas Ovens: How to Fix Uneven Temperatures? — Inspect Flame, Thermostat, and Door Seal Against the Oven’s Nameplate

No. Diagnostic Area What to Check Possible Cause of Uneven Heating Recommended Action Nameplate or Safety Reference
1 Oven flame With the oven operating, observe the burner only through the normal viewing area. Look for delayed ignition, repeated extinguishing, or an obviously irregular flame. Combustion or burner problems can lead to inconsistent heat. Flame appearance varies by burner design and should be assessed against the appliance instructions. Turn the oven off if ignition is delayed, the flame repeatedly goes out, or you smell gas. Contact a qualified gas technician; do not adjust the burner yourself. Confirm the oven is configured for the gas type stated on its rating plate. Do not convert or adjust gas components without qualified service.
2 Thermostat or temperature sensor Place an oven thermometer near the center of the middle rack. Compare readings over several heating cycles after the oven has preheated. Normal burner cycling causes temperature swings; a faulty sensor or control may cause persistent, substantial deviation. Repeat the test with the same rack position and a stable setting. If the difference persists, consult the manual or arrange service before replacing parts. Use the temperature scale and operating instructions specified for the exact model shown on the nameplate.
3 Door gasket and closure Check that the door closes evenly and inspect the gasket for gaps, tears, hard spots, or sections pulled away from the channel. Escaping heat can make cooking temperatures less consistent, especially near the door. Clean the gasket gently as directed in the manual. Replace a damaged seal with the correct part; do not stretch or alter it. Identify the model from the rating plate when checking the manual or ordering a compatible gasket.
4 Rack position and airflow Check that racks are level and use the position recommended by the recipe and appliance manual. Avoid covering vents or blocking the oven floor. Blocked circulation or an unsuitable rack position can create hot and cool areas. Center the cookware on the rack and leave space around pans for heat circulation. Do not line the oven floor unless the manual permits it. Follow the rack-position and ventilation guidance for the identified oven model.
5 Cookware placement and size Check whether a large pan, foil, or several tightly packed dishes obstructs airflow or shields part of the oven. Oversized or crowded cookware can prevent heat from circulating evenly around food. Use appropriately sized cookware, leave space between pans, and avoid placing foil where it blocks vents or burner openings. Refer to the manual associated with the nameplate model for approved cookware and foil use.
6 Preheating and door opening Allow the oven to signal that preheating is complete, then minimize door openings during cooking. Loading food too early or repeatedly opening the door can lower the cavity temperature and extend recovery time. Preheat according to the manual and use the oven light to check food when possible. Use the preheat instructions and temperature units provided for the appliance.
7 Burner area and food residue When the oven is cool, look for spills or debris around accessible areas. Do not remove burner parts unless the manual specifically permits user cleaning. Residue near burner openings may interfere with operation or produce smoke and odors. Clean only the surfaces and components identified as user-serviceable. Leave burner disassembly and repairs to a qualified technician. Follow the model-specific cleaning instructions; never probe burner openings with tools.
8 Gas supply and configuration Check whether other gas appliances show a problem and whether the oven has recently been moved, installed, or converted. An unsuitable supply, incorrect setup, or installation issue can affect burner operation. If the flame is abnormal or performance changed after installation, stop using the oven and have the supply and setup checked by a qualified professional. The nameplate identifies the required gas type and appliance ratings. It does not authorize changing supply pressure or conversion components.
9 Temperature-control setting Confirm the selected temperature, cooking mode, and temperature units. Check whether a temperature-offset setting has been changed. An incorrect mode, unit, or calibration offset can make the displayed setting differ from the intended cooking condition. Restore settings according to the manual. Use calibration adjustments only if the manufacturer provides a procedure for the model. Match the operating instructions to the model and serial information on the nameplate.
10 Installation and level Check that the oven is installed securely and is level, and that required clearances and ventilation are not obstructed. Improper installation can affect safe operation and may contribute to uneven cooking or service issues. Do not move a connected gas appliance yourself. Ask a qualified installer to verify installation and leveling. Use the installation requirements for the exact model. The nameplate is typically located on the appliance frame or behind the door area.

Safety: If you smell gas, do not operate switches or use an open flame. Leave the area and contact your gas supplier or emergency service from a safe location. Never remove or adjust gas components yourself.

Retest at 180°C and Compare Temperature Swings Before and After Repair

Set the oven to 180°C and place a reliable oven thermometer near the center rack, away from the walls. Allow the full preheat cycle, then wait another 15 minutes for the temperature to settle. Record the reading every five minutes for 30 minutes without opening the door. A swing from 165°C to 195°C matters more than one brief dip after the burner switches off. Keep the rack position, cookware, and room conditions the same during every test. Small details change results.

Before repair, my readings once looked worse because I checked too soon after preheating. That was a useful reminder: consistency beats haste. After a qualified technician checks the thermostat, sensor, or burner, repeat the exact 180°C test and compare the highest and lowest readings. For example, a range of 30 degrees narrowing to 12 degrees suggests steadier control, though it does not prove perfect baking performance. Note any uneven browning as well. If temperatures remain erratic, or you smell gas, stop using the oven and contact a qualified service professional; do not adjust gas fittings yourself. Keep the test log, even if one reading seems odd.

FAQS

What should I compare when choosing a gas oven?

Compare burner position, cavity size, rack spacing, temperature controls, and circulation features. Appearance alone tells little.

Does GB 16410-2020 guarantee even baking?

No. Compliance does not ensure identical temperatures across racks. Check the model’s documentation and test actual cooking results.

How can I check heat at different rack levels?

Place oven-safe probes near the front-center of three racks. Set the oven to 180°C and preheat it. Record readings every five minutes for 20 minutes, keeping the door closed.

Why should I repeat the temperature test?

Gas burners cycle, and a single reading may mislead. Use the same probes and positions each time. Not a lab test.

What can rack-level readings tell me?

A warmer upper rack and cooler lower rack may affect browning. Choose a suitable rack or rotate the tray if the manual permits.

How can I check whether the oven matches its nameplate?

With the oven cool, photograph the nameplate and note the model, fuel type, and rated gas input. Compare them with the manual. Ask a qualified technician to check any gas conversion.

What signs of a flame or door-seal problem should I notice?

A persistently weak, yellow, or sooty flame needs professional attention. Look for tears, flattened spots, or gaps in the door seal. A slipping paper strip is only a rough check.

What should I do if the oven temperature seems far off?

Check thermometer accuracy, rack position, and the door seal before drawing conclusions. Share your readings and nameplate photo with a qualified gas-appliance technician. One uneven bake may not prove much.

Conclusion

This guide compares ten leading gas-oven configurations in China, focusing on burner layout and the performance requirements of GB 16410-2020. To identify uneven heating, set the oven to 180°C and measure the temperature at three rack levels after it has stabilized. These readings help reveal persistent hot and cold zones and show whether rack position or burner distribution may be affecting cooking results.

For how to fix an uneven temperature in a gas oven, first confirm that the gas type and supply pressure match the oven’s nameplate: common reference pressures are 2.0 kPa for natural gas and 2.8 kPa for LPG. Check the flame, thermostat operation, and door seal for signs of a problem; have gas connections or internal components assessed by a qualified technician when needed. After any adjustment or repair, repeat the three-level test at 180°C and compare the temperature swings with the original readings to evaluate whether heating has become more even.

Sophia

Sophia

Sophia is a dedicated marketing professional with an exceptional depth of knowledge about her company's products and services. With a keen understanding of market trends and customer needs, she crafts insightful blog posts that not only inform but also engage readers, enriching the company’s online......